TPT Seller.... Finally!


As I mentioned in my Summer Projects post, I had a goal to get some of my teaching resources up on Teachers Pay Teachers. I am pretty tech savvy (or so I thought) so I figured it would be a simple process. Update and jazz up the resources I have already, and post them. Then I can start making more. Easy peasy, right?

WRONG!

It was definitely not as easy as I thought it would be! Roadblock after roadblock, I have spent many long summer hours working on this goal! First, my resources were made with only the intention to use them in my own classroom. So I had to go through them and change anything that might be a copyright infringement, replacing images, fonts, backgrounds, etc with ones I have purchased the rights to. Crediting and linking everyone. Creating cover pages and end pages. I was lucky to stumble across some extremely helpful websites, such Teaching in the Tongass and Erica's EDventures. Learning how to flatten and secure my documents took the longest (especially since I didn't even know what that meant!) and I had many trials and errors along the way. 

But this morning, I DID IT! I posted my first product (first one is always a freebie) for the teachers of the world to use! Or not. I really don't know if it is even that good. I have two more products to post, and then I have work to do if I want to make more! I have some old (and super old) stuff I could revamp and post, but that might be more work than starting from scratch! All in all, I had fun learning all the new tech, and am excited to delve into the world of being a Teacher-Seller! 

My very first TPT product!!!

Summer Projects


When people invariably ask me in the month of June "Are you excited for Summer?" I think that they imagine me chilling on a beach somewhere with a mojito, not thinking about school at all. Usually I let them think that, (I don't want to seem like some sort of freak) but really I am excited at the prospect of having time to LEARN!!! Super nerd here! 

The last few summers I was taking university Ed Psych courses, and I thoroughly enjoyed them, but I am taking a break from that for a bit (mostly due to the cost of university courses, sheesh!) and focusing on Ed Tech. I am starting my summer of learning by taking the Google Certified Educator Level 1 course, and so far it is pretty basic. I am hoping to blast through it and take Level 2 as well. I am so excited to use even more Tech in my classroom this year, and am thrilled that I will actually have some Tech Coach time embedded in my position to help others in my school with Tech implementation. Squeeeee! 

The second Summer Project I am starting is to finally get some of my resources on Teachers Pay Teachers. I don't have much created yet, just some simple things, but I am hoping to delve more into that over the next year. 

Lastly... CRAFTS! I created these lovely Crate Seats last summer and they were a HUGE HIT both with my kids and with the staff. I don't know why people were so surprised that I made them. I'm crafty! So this year I am looking at creating some more furniture for my room. I'm not sure what yet... but I have a lot of pallets....


Flexible Seating In Place!

For more information about Flexible Seating in general, or for how I started it in my classroom, see HERE.

Kids working at low table and standing desks
Flexible seating worked wonderfully in my classroom this past year. This Summer I am moving to Grade 3, and changing classrooms. So the challenge is to create a whole new space for my littles. I will be teaching many of the same kids this upcoming school year, so they are experts in flexible seating. I am trying to start with as blank of a slate as possible (while still hoarding the furniture I want, lol) so that the kids can help me figure out how to set up the classroom come September.

Yesterday I was in my classroom moving stuff in after the big floor waxing, and was too disappointed to even take photos. I should have anyway, just as a starting point. The classroom itself is a bit smaller than my old one, as it has a wall that juts partially into the space due to vending machines on the other side of the wall. It has windows on only one side, instead of two, so that has both it's pros and cons. Once I go back in August I will take some "Before" pics and process pics.

Flexible Seating

I have always allowed some degree of flexible seating in my classrooms. If I had a student who liked to stand, I would raise their desk, put them to the side or back and let them stand. If I had students who liked to work on the floor, I said "go for it!". Like so many things that I have always just instinctively done, suddenly it's everywhere, and it has a name: FLEXIBLE SEATING!

The Why:
Current "best practices" are all about giving students choice. I embrace them all! Choice in what they are working on (Daily 5, Guided Math), choice in their projects (Genius Hour, Book reviews), choice in what they spend their daily "On the Ball" Bucks on in the classroom. Making good choices is an important skill and one that kids need to practice to be good at! So why should where they sit (or stand) be any different? I know that even as an adult, when I am at a conference or workshop and am expected to sit in a chair and listen for hours, I turn into that "disruptive, tuned-out fidgety" kid that drives every teacher crazy!

The How:
Before I attempted to make Flexible Seating in my classroom even more of a thing, I did some research. Mainly looking at blogs of teachers I admire and seeing how their classrooms are set up. When I made my Crate Seats this summer, I took a lot of info from Tammy over at Literacy Loves Company, and she has so much amazing stuff! I loved the way she got her class involved in the decision making process when it came time to tackle Flexible Seating! So following her lead, and the kids and I sat down to talk about it. We discussed the difference between places that are just fun, and places where they feel they could actually work. One of the ideas that came up is that many of them wanted a way to have some privacy when they were working. That surprised me, as they have never asked for or tried to find privacy... but we talked about it, and they idea of foam board privacy walls was put on the chart. We added all the spaces they like to work, and then they each got two sticky notes to add to the chart.


This was when everyone voted for privacy walls,
So I took it off the list, saying we could get a class set,
and they changed their votes. 
After the second vote. We don't actually HAVE a couch,
but now I will try to find one. On the CHEAP!
 I found the results very interesting! Not one kid voted for a regular table and chairs, and that is one thing we actually do have in our room. This explains why it ends up just being a dumping ground for me! lol I was also interested that 5 kids (that's almost 1/3 of the class) voted to just keep using their student desk like normal. The "low table with pillows" got only two votes the first time round, but then got the most the second time! There may have been some peer pressure involved here, but it is an easy one to try, as I have a table that lowers, and some fundraising money to buy pillows. It's a start!

Next up... a trial run! Stay tuned...

Classroom Reveal!

It didn't happen as soon as I wanted, but I finally posted my classroom pics! I made a page for it, so it is easily accessible, and so that I can adjust it as I change things in my space. Check it out HERE!


Frock Box, Clothe me!


I don't like shopping. I never have. I am a plus-sized girl, so here in Canada, that means I have the option of about three stores to buy clothes. I kept seeing posts all over the place about various subscription boxes, and mainly I just ignored them. Then my cousin was telling me about the subscription box he gets (Loot Crate), and how the best part of his crates is the clothes. Huh... clothes? I didn't know I could get clothes. You mean I wouldn't have to shop, or even know what stores to order online from? I like the sound of that! So I looked up what boxes are Canadian, because there is no way I would be willing to pay the ridiculous exchange rate for a US based box. This lead me to an excellent website called Canadian Subscription Box Addict! Jill from Vancouver has a whole list of all the main subscription boxes, and blogs about the many she has ordered! The best part for me is that she says which boxes are Canadian. So amazingly helpful!
That's where I found the link to Frock Box!
Use the code 15PLEASE for 15% off your first month!

Basically, Frock Box has people (actual people) who choose clothes for me based on the profile I create. To start, I choose which box I want. There are three options:
  1. Frock Box Favourites ($24.95/month Free shipping) - you receive 5 pieces of clothing. Items are individually priced between $34-$69. You keep what you love, and only pay for those items. The original $24.95 is subtracted from the cost of what you chose to keep. The things you don't want, you simply put back into the bag with the pre-paid postage sticker and drop it back in the mail before the due date. So simple!
  2. Frock Box Gold ($49.95 plus $9.95 shipping) - you receive one complete outfit each month for that cost. Done and done. Usually includes a top/bottom, dress, or top/cardigan plus a piece of jewelry to complement the outfit. 
  3. Frock Box Jewel ($29.95 plus $3 shipping) - you receive one piece of handmade jewelry from a Canadian Designer each month. 
I chose Frock Box Favourites, because I like to be able to try on clothes before I buy them. Just because it is technically "my size" doesn't mean it fits well. I went through the sign-up process, which was super easy! It asks for your hair colour, sizes (height, weight, shirt size, pant size, bra size), profession, and birthday. Then it shows you a few outfits and you choose the ones you like. I do feel like a few more options on this page would be helpful. Next you choose what types of items you would like to receive. I chose tanks, shirts, pants, dresses, skirts, purses and jackets, and said I don't want shorts, shoes, hats, sunglasses, jewelry, sweaters or swimwear. It asks you what kinds of things you do on the weekend, but again, only gave 5 options. Then it asks if you want to "play it safe", "in the middle", or "trendier the better". I chose the last one. Go big or go home! Last it gives you space to type any other information you want your stylist to know. This is where I told her I am a teacher but don't want to look like one! I told her what the dress code requirements are at my work, because I don't want anything I can't wear regularly. I also attached a link to my fashion Pinterest page so they could look at what I like. That's it! Easy. Now... the waiting...

My August 2016 box came mid-month, and I was so excited to check it out!
In the bag (not actually a box, but doesn't need to be. This is less wasteful!) there were the five pieces of clothing, the invoice telling me the cost of everything, and a card asking me to enter a contest by posting a pic of me wearing the clothes on Instagram, and letting me know who my stylist is. My stylist is Liz. Thanks Liz!

Coral Lace Neckline Top - $39
This was the first thing I noticed when I opened my bag, and I immediately loved the colour! The fabric is thin and soft, and needs a cami or tank under to smooth out bra lines, but other than that, I loved it! I got LOTS of compliments on the colour the first time I wore it too! Yay!
KEEP!

Purple Grandpa Cardi - $49
I like the colour, but I don't care for things with buttons because on me they always gape when I do them up. Undone, I don't mind the cardi, and I might wear it... maybe. 
RETURN (although with the sale I kept it) *see below

Shop the Trends Black Blazer - $54
The fabric is a bit rough, but it works for a blazer. I've never really been a "blazer person", because I get too hot normally. But this fabric is fairly breathable, so I think I would be cool enough in it. I liked it both undone, and with a broach to clip it closed (I only wish it had a button to close it, and I might just sew one on). 
KEEP

Denim Shorts - $39
Now, I could have sworn I said "no shorts" on my profile. I can't wear them to work, so there is no point in having them. They were nice enough shorts, but I couldn't even pull them up past my knees. I am a size 16/18 in pants, and these weren't even CLOSE to that (even though the tag says they are). I don't recognize the brand but I think it may have been UK sizing?
RETURN

"Blessed" Sharkbite Tank Top - $39
This was my favourite item in the bunch! Soft and flowy, it fits nice, looks good, and with something over top, I could wear it to work. 
KEEP!

Note: they had a Anniversary Sale, where I could keep everything for $99. This was cheaper than just keeping the three things I wanted to keep. So, I marked the ones above that I would have returned, but this month I kept them all. The shorts I will donate to my local Thrift store. 

All in all, I was happy with my first month! If there is even one thing per month that I love, it would be totally worth it to me! Don't forget to use the code 15PLEASE if you decide to try it!

Crate Seats!

Storage is always an issue, or at least it has been in the school where I work. We have one tiny storage room in the school, but we aren't allowed to put any of our own stuff in there. My classroom itself has only a couple shelves and cupboards, but that is mainly used for stuff I use regularly. For years I put fabric around tables like table skirts, and stored all the extra boxes under them. It was a waste of space, and didn't really look good.
Last year, I bought a cube storage unit second hand for $100. It stores all the supplies for our science centres, my seasonal decorations, extra school supplies for my kiddos, novel study units, headphones for computers, extra letters and other bulletin board stuff, and much more! Best of all, it looks good! The whole thing even sits in front of a bulletin board at the back of my room, so that's one less I have to decorate! Win win!
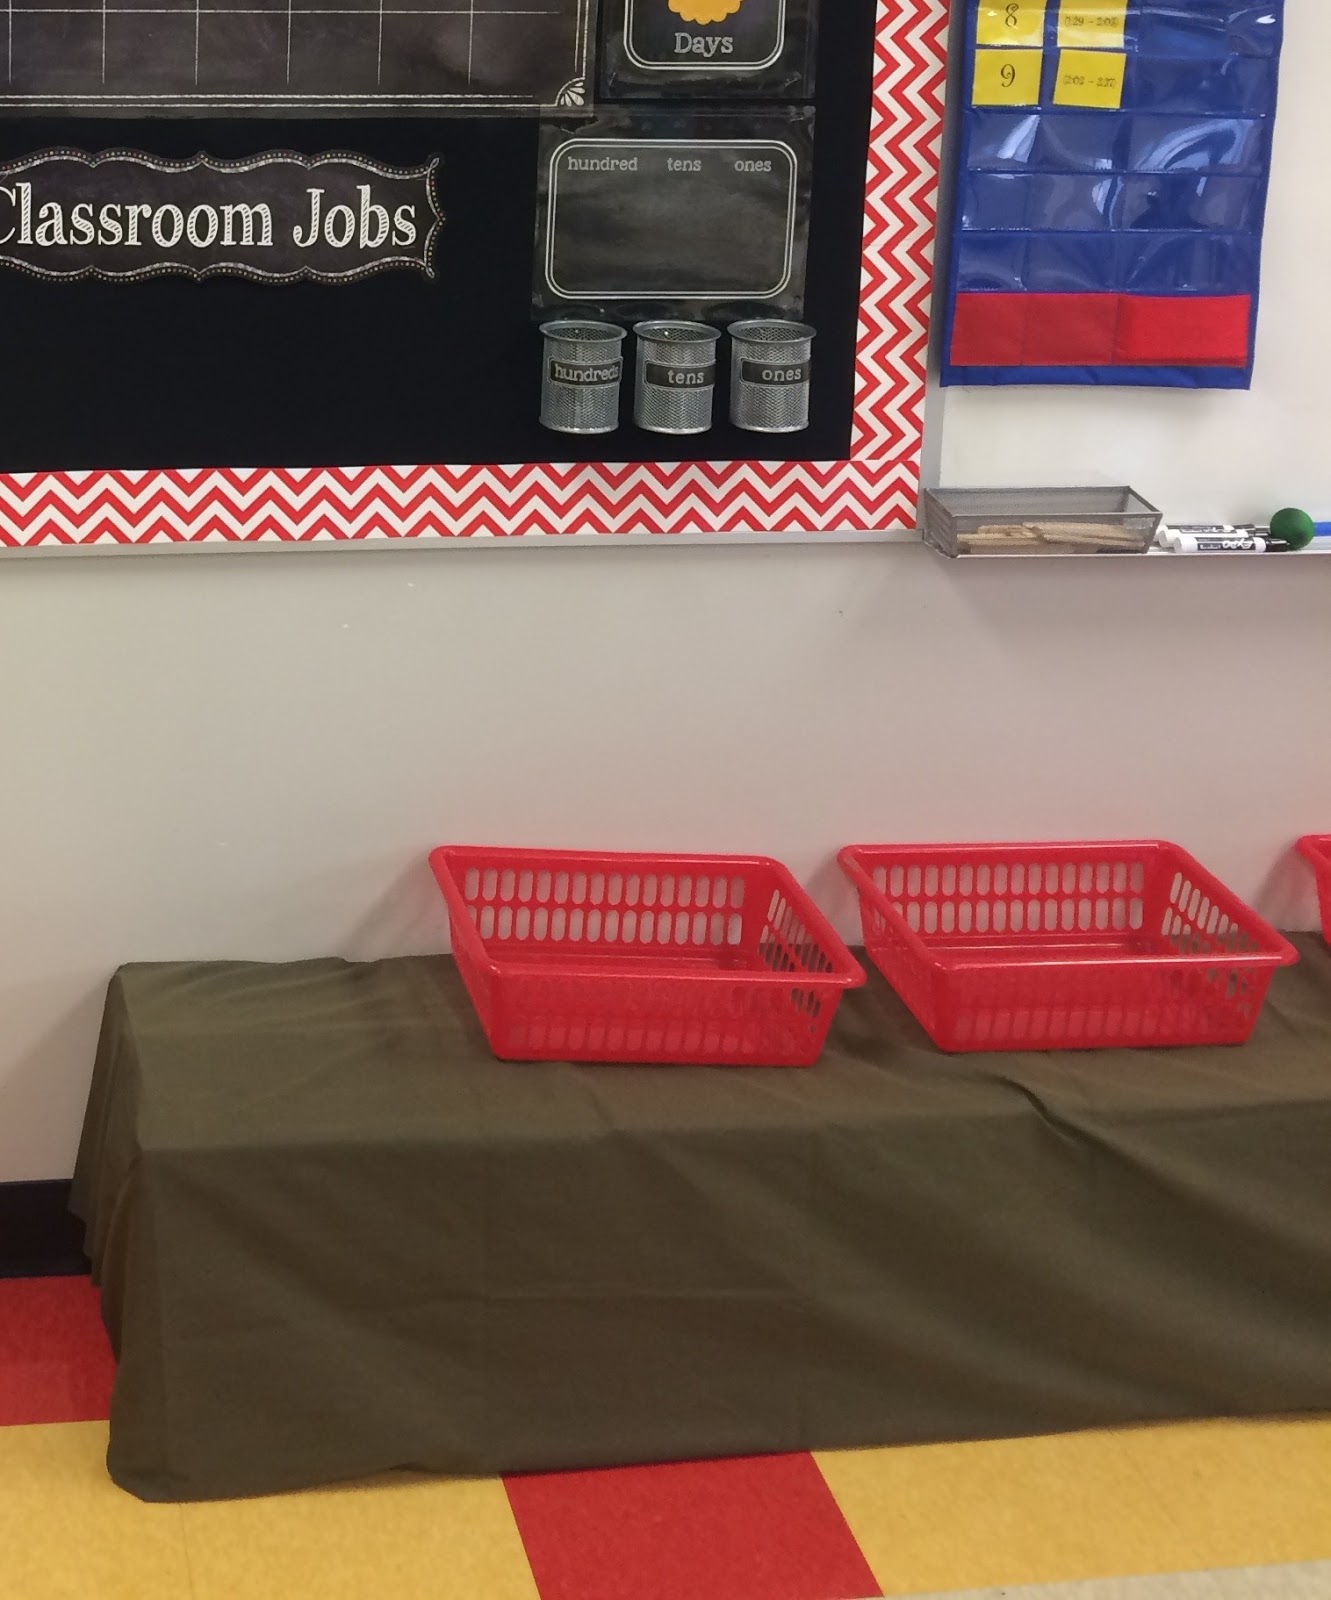
But I still had 7 U-Haul boxes full of my Grade 6 resources and books. Again, I came up with an ingenious (if I do say so myself) plan, and made the boxes into a shelf along my front wall, covered them with fabric, and put paper bins all along them for student notebooks, extra paper, and things like that. Perfect! Until the first time I needed to get something out of one of the boxes, but couldn’t without taking apart my whole shelf. Not such a great plan after all.
This is the temporary version I threw together this year until my crates were ready. 
Plus, the kids always like to sit around the room when they are working, and would often sit on the boxes. Over last year, many of them broke or caved in.
There is "talk" all over teaching blogs lately about “Flexible Seating”, which is something I have always done. I had “standing desks” 12 years ago when I first started teaching, but I didn’t call them that. I just had some kids who preferred to stand, so I raised their desks up. Kids in my class have always chosen tables or desks or carpeted floor… wherever they work best.
So this year… CRATE seats!


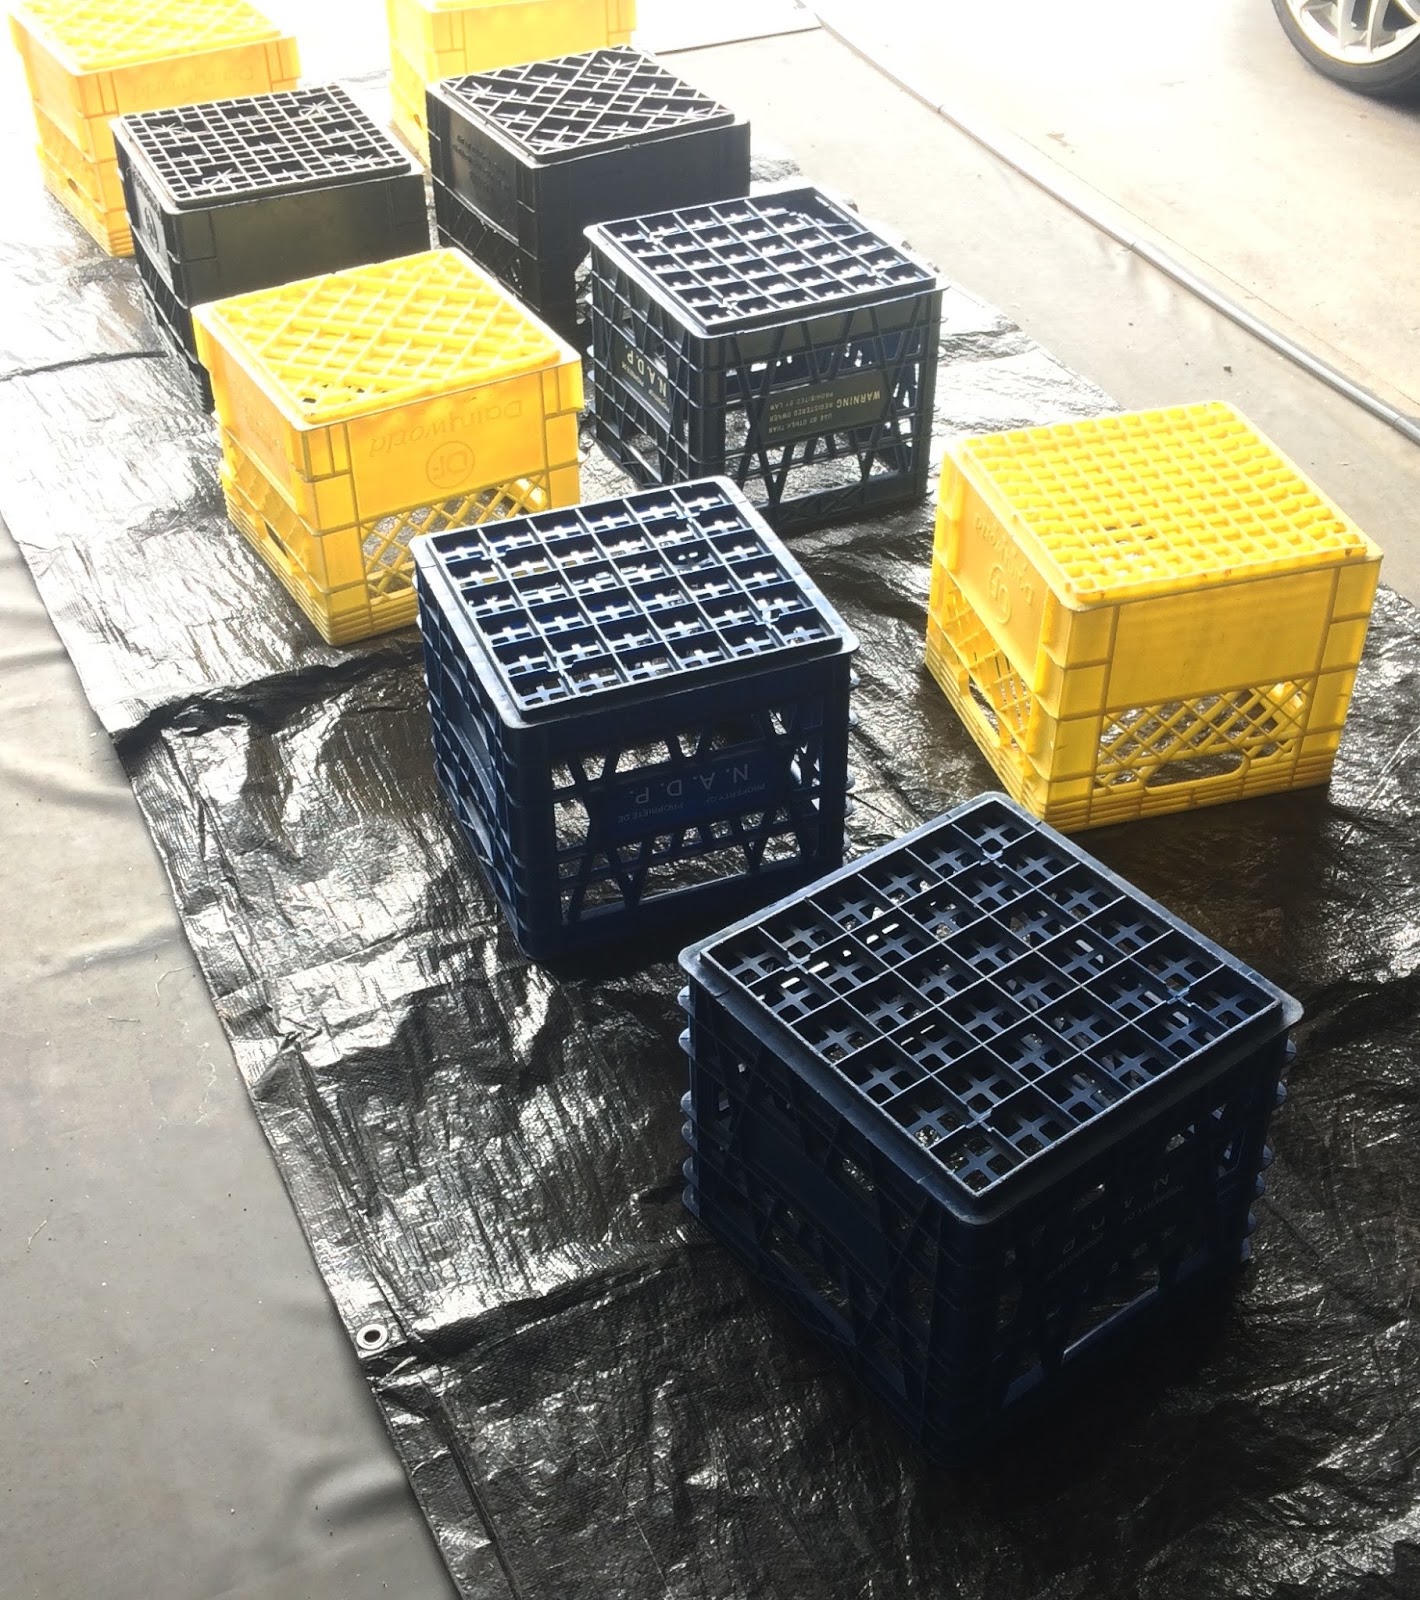
I haven’t done a big craft project in a long time, so I was pretty excited about this! I bought 9 milk crates for $5 each from a farmer on Kijiji. I could have bought crates at Home Depot for $6.95 each and I actually wish I had just done that instead, because the ones I bought I had to wash and paint, so it actually probably ended up costing me the same or more. Live and learn.
I washed them with our pressure washer (kind of fun!) and then spray painted most of them black. I ran out of spray paint more than once, so I have some I left yellow. Again, would have been easier to just buy black ones.
Next, I needed wood, foam, and fabric. The wood was the cheapest I could find. $13.99 for a 4x8' board of OSB from Home Depot. At my Home Depot, the first three cuts are free, so I got the nice fella to rip three long 14" pieces for me.
My hubby (with a me only really helping a tiny bit) cut all the rest of the wood for me. For each crate, I needed a 14x14" piece and a 12x12" piece. We actually cut the 12x12 ones just a little bit shorter than that, so they would fit inside the crate without me having to round the corners. My crates do not have an inside lip (some do), hence why the inside piece to hold the top in place. 
For the foam and fabric, I hit my local Wal-Mart. The foam was a mattress cover, and cost me around $20. I bought two, because I wanted two layers for comfort and puffiness. The fabric was kids sheets, the Mainstays Kids Microfibre sheet sets. They had tons of different patterns, and were only $16.94 for a twin set. One set would have been plenty to make a dozen crate seats, but I wanted two different patterns.  
I cut the foam into 14x14" pieces and 16x16" pieces. The smaller piece would be the same size as the wood top, and the larger piece would wrap around the edges. Then I laid one piece of fabric, then the smaller foam piece, followed by the larger foam, and then the wood top. I wanted to sandwich the smaller foam in between the second foam and the wood so it would be thicker in the middle without a line where the smaller foam would be. I put some glue in between each layer so it wouldn't slide around over time. 
Then it was just a matter of stapling the fabric around onto the back of the wood. I started with the corners, and then the sides. It took some trial and error to get it looking decent, but even the first couple looked pretty good. 
Next I centred the 12x12" wood piece over the first part, trapping the fabric ends in between, and screwed it on with 3/4" wood screws. I decided not to glue them together, thinking that if my fabric ever starts to wear out, tear, or get super dirty, I could remove the bottom wood, recover the top with fresh fabric and replace the bottom part. Thinking ahead! 
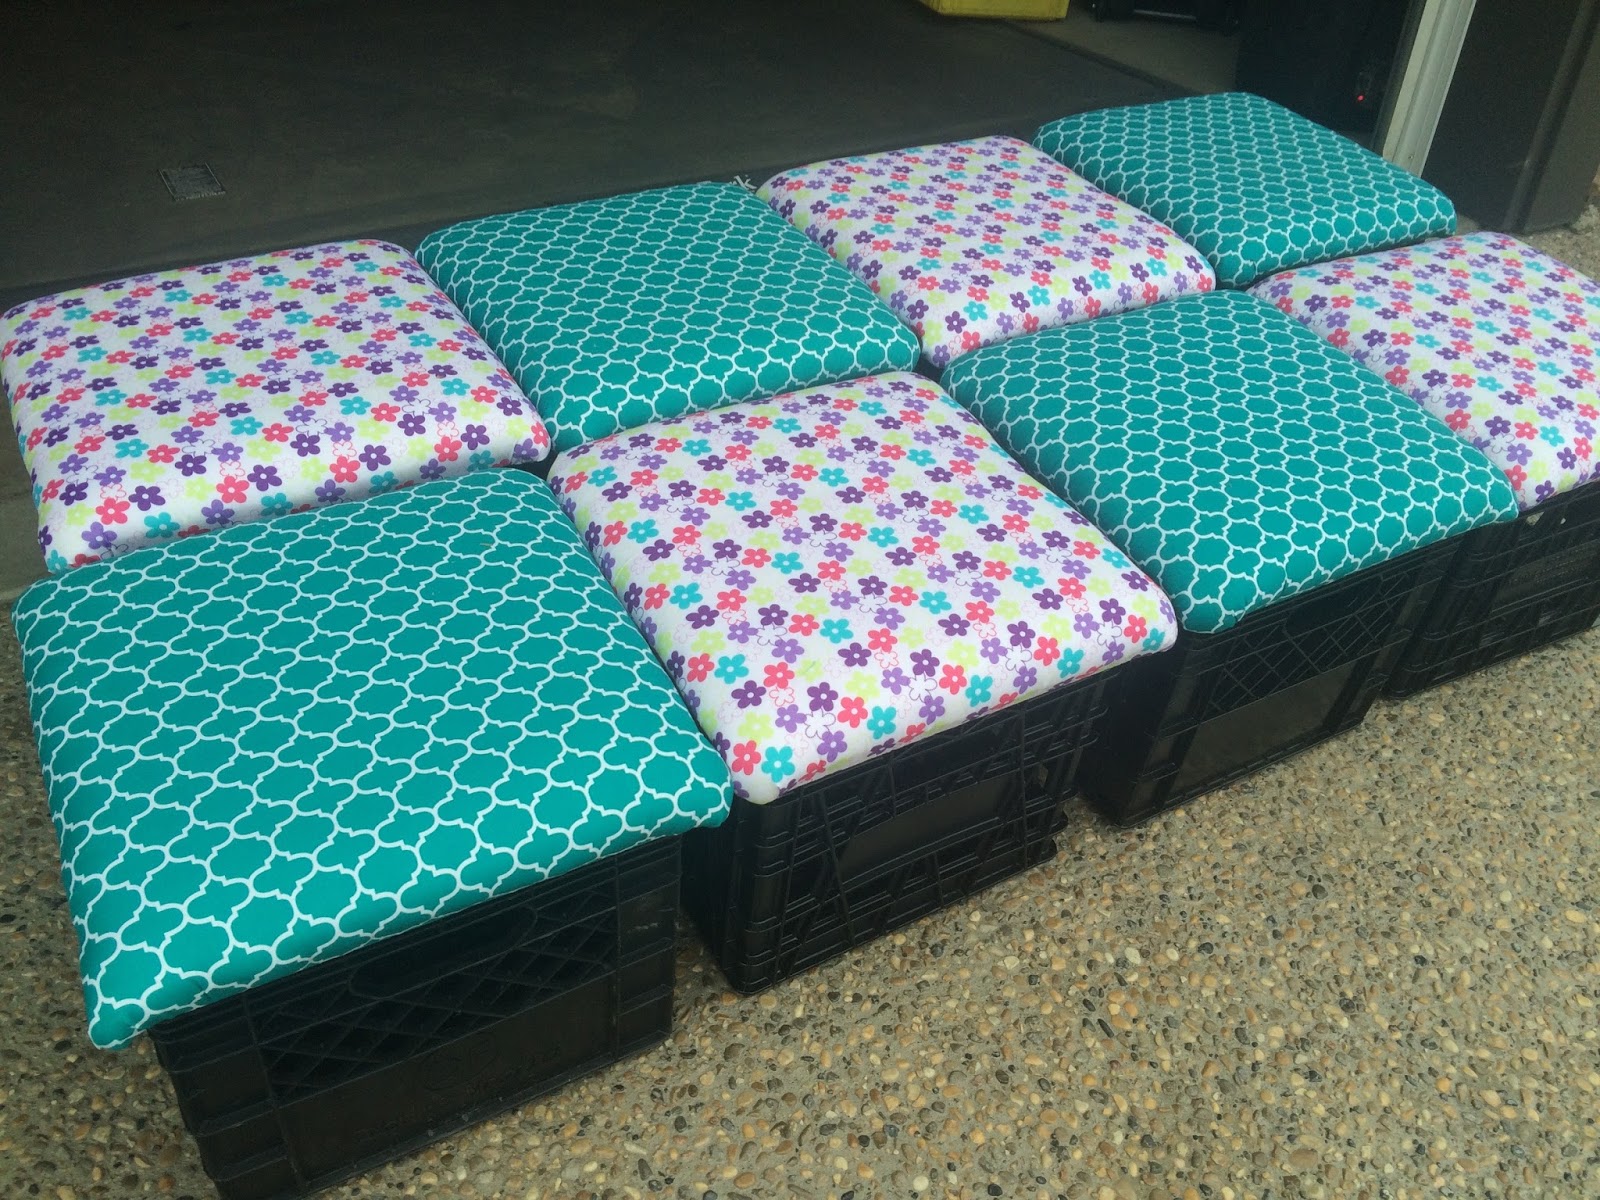
 Place the finished top part onto a crate, and done!!! Beautiful crate seats, ready to be filled up with all my extra storage materials! The bonus to filling them is that it also makes them more stable, and I don't want my kids to move them all around the room. I will place them around the room where I want them, and they can pick one to sit on. I will be able to move them, but they will be too heavy for my Grade 2s. Perfect!


 All loaded into my vehicle, ready to go to school tomorrow. I will post pics in my Classroom Reveal once I get them filled and placed around the room. So excited!